Optimal Photo Mosaics
I challenged myself to find out how to create my own photo mosaics from scratch. The resulting tool can create mosaics in mathematically optimal quality!
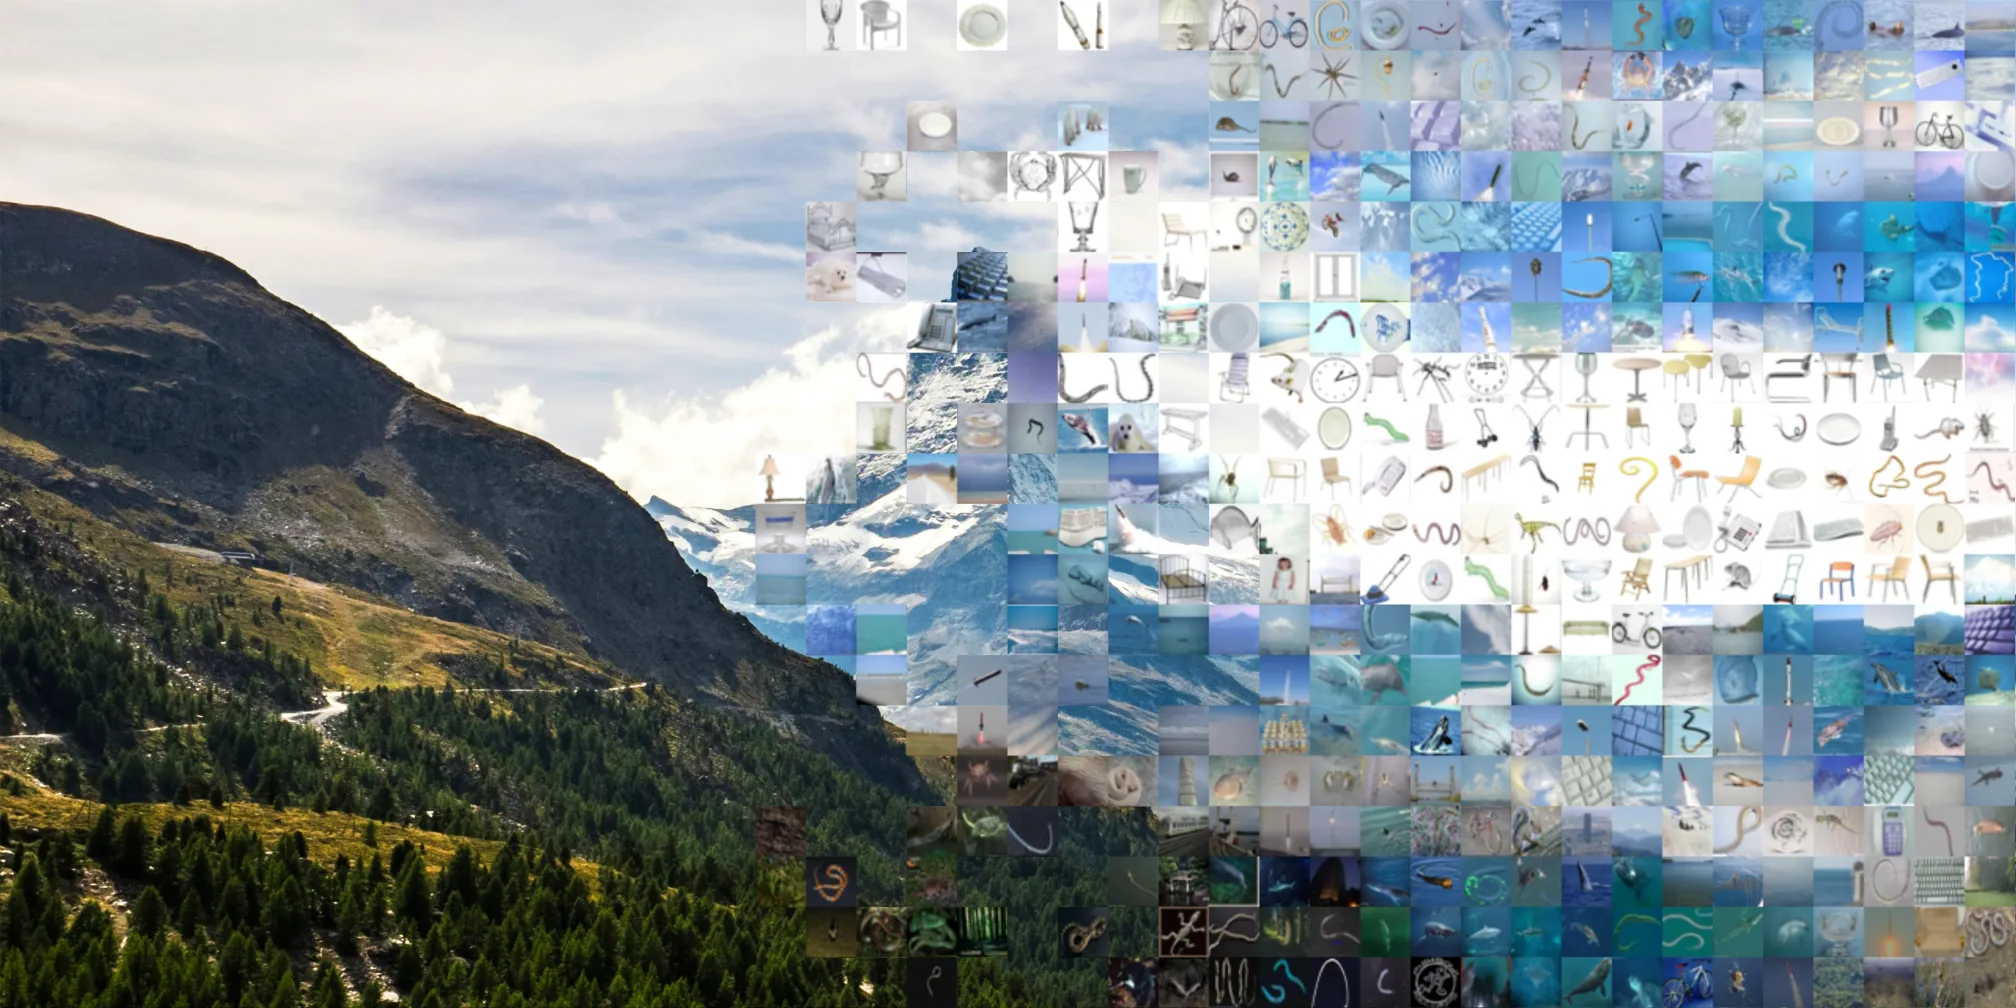
By the way, did you notice that the summit of this picture of the Matterhorn is a computer keyboard?
Update: Photo Mosaic Web App
I am currently developing an ASP.NET Core web app with an Angular frontend that facilitates the mosaic creation process. For me, the goal of this project is not only to make these mosaics more accessible, but also to become more familiar with the .NET environment, Docker Compose and Kubernetes.
Thanks to Docker Compose, you can get it running locally in just 2 minutes! Simply clone the repo and run docker-compose up.
Alternatively, the project also contains templates that facilitate deployment to a Kubernetes cluster.
What is a Photo Mosaic?
Photo mosaics are the “perfect” solution for people with too many pictures on their phone.
Instead of printing just a single boring picture, we instead divide it up evenly into n square blocks.
Each block is then replaced with a picture from a set of m other pictures, called tiles.
The trick is to choose a tile that visually matches the block of the target picture that it replaces, resulting in a cool pixelation effect as seen in this example:
An example of a mosaic with n=600 tiles. Tile pictures originate from the CIFAR-100 dataset. Because the data set contains images that are very similar to each other, some tiles appear to repeat themselves.
Limitations of Existing Tools
By developing my own tool for creating photo mosaics, I addressed several limitations of existing tools:
- Tools often cheat by overlaying the target image on the mosaic to hide a lack of quality.
- The maximum number of tiles and blocks is quite low.
- The same tiles are used more than once.
- Costs: Even free tools have their advanced features hidden behind paywalls.
My Approach
Let’s reformulate the search for an optimal mosaic as the problem of finding an assignment of tiles to blocks in the target image. We are interested in an assignment that minimizes the sum of distances between block and corresponding tile.
We define the distance function in a way such that visually similar blocks and tiles are close together. The easiest way to do this is to compute their average color and interpret them as points in a 3D space, one dimension for each color channel (red, green and blue).
Tile Subdivision
Only comparing the average color is computationally efficient, but results in mosaics of poor quality. Unfortunately, this is exactly what many available tools are doing.
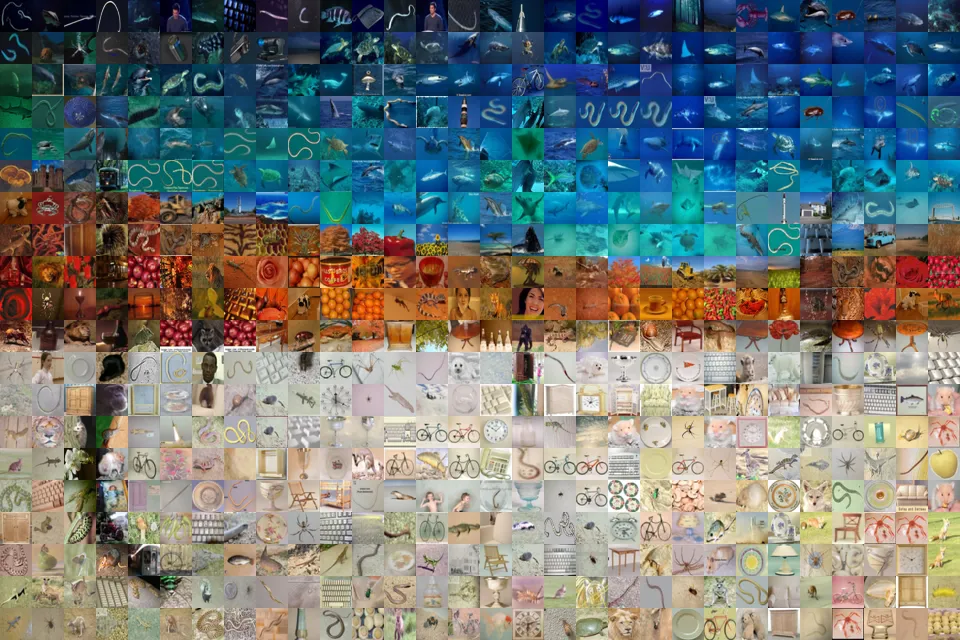
A simple improvement is to split each tile into r * r smaller parts and compare the average color on this subdivision level.
This allows us to choose tiles whose structure is similar to the part of the target picture it replaces.
You can clearly see the difference in the following example, by focusing on the edges of the different color regions:

Comparing a photo mosaic constructed with no subdivisions (r=1) to a mosaic with subdivisions (r=7).
Finding an Assignment
Existing tools often rely on algorithms that randomly swap two tiles and check whether this improved the mosaic quality. This approach is computationally more efficient, but can only approximate the optimal assignment of tiles to blocks.
My approach is to represent the problem as a linear assignment problem.
We can then solve it optimally with Python and SciPy’s linear_sum_assignment to get our desired mosaic!
Learn More
- View the paper about my experiments that I wrote as part of the Scientific Writing seminar during my Master’s degree.
- Download the Python script to create your own photo mosaics.
- My Photo Mosaic Project on GitHub.
